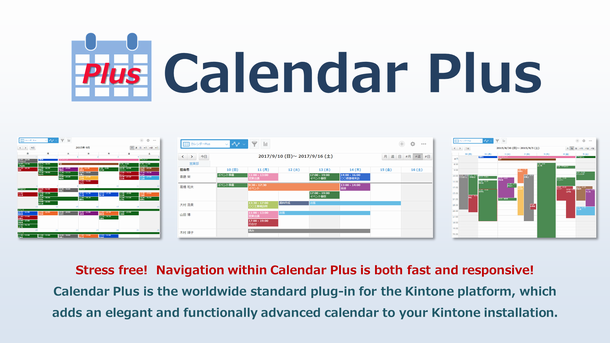
Calendar Plus is a plug-in for the Kintone platform which adds an elegant and functionally advanced calendar to your Kintone installation.
Ver.16.2 Release (13 May 2026)
- Stress free! Navigation within Calendar Plus is both fast and responsive!
- Share events and meetings with others!
- Register your own private events!
- Easily assign colors to categorize events!
- Full support for multiple timezones!
- Multiple language support! (English, Japanese, Simplified Chinese, Traditional Chinese and Spanish)
- Supports installation within a Guest Space!
What is Calendar Plus?
Calendar Plus is a plug-in for the Kintone platform which adds a fast and responsive, elegant and advanced calendar to your Kintone installation. Schedule management is simple and intuitive, and the layout can be easily changed to display schedules by calendar month, week, day, or even by assigned color. In addition to the Basic version which provides general calendar functionality, the Pro version has added support for managing and scheduling resources such as person in charge, conference/meeting rooms, vehicles, or any other custom resource. Calendar Plus also supports linking with Kintone's Departments & Users (in Users & System Administration) to provide a complete schedule overview for the entire organization.
Calendar Plus Basic
[Fast and responsive general calendar functionality]
Use drag and drop to easily rearrange and share your schedule.
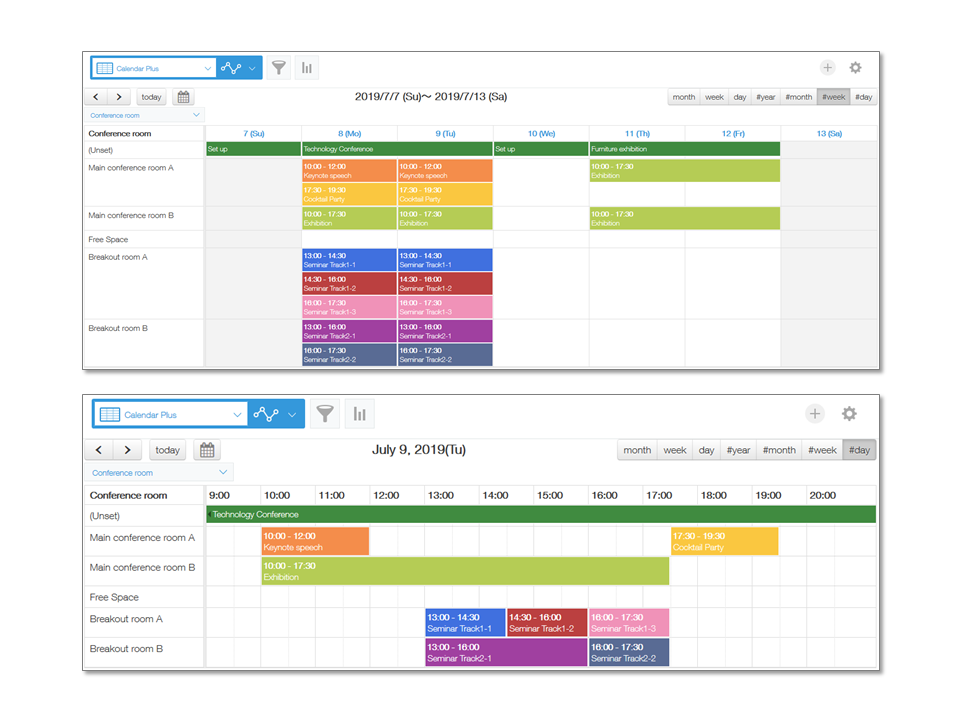
Calendar Plus Pro
[Fast and responsive calendar functionality with resource scheduling support]
In addition to all of the functions provided in the Basic version, up to five different resources (person in charge, conference/meeting rooms, etc) can be freely added to and shared in your schedule.
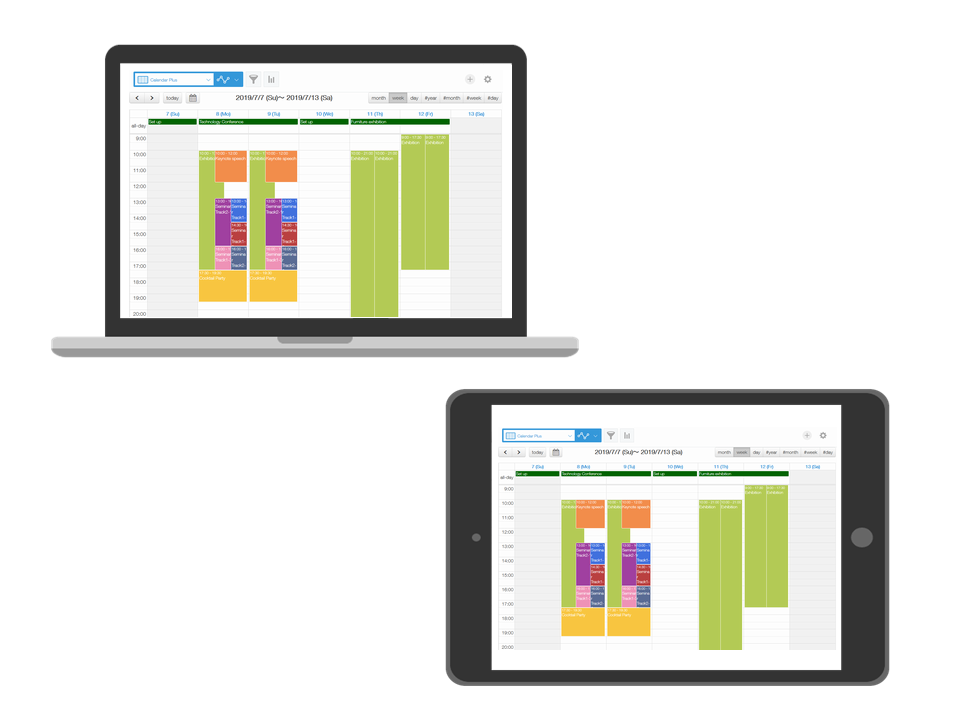
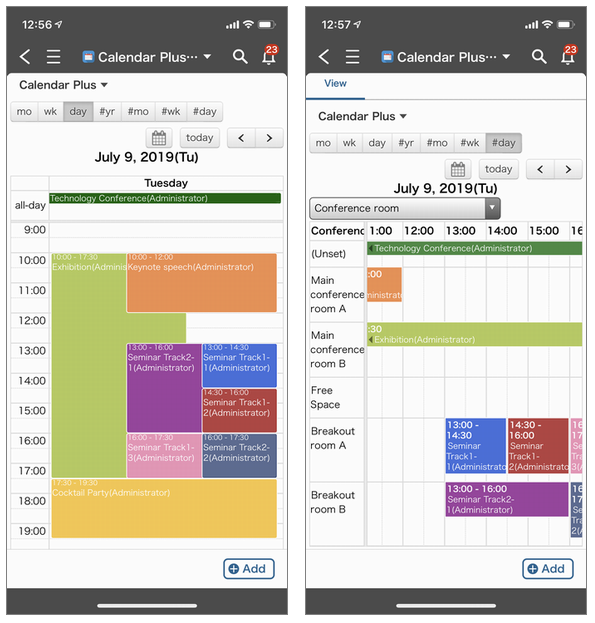
Mobile optimized
You can check and register your schedule right away.
Calendar Plus JavaScript API
You can supplement the standard behavior of Calendar Plus with your own JavaScript.
For example, you can rewrite the value of a field at the time of schedule registration,
or register a newly set field information.
Click here for Calendar Plus JavaScript API Reference
[Calendar Plus JavaScript API Collaboration Services]
gusuku Customine
(No-Code Customization Platform for Kintone)
Learn more
Download Calendar Plus Product Information (PDF)
(Japanese only)
Licenses
| Trial License | Paid License (Basic) | Paid License (Pro) | |
|---|---|---|---|
| "Unlimited" Trial Period |
✔ | - |
- |
| "Unlimited" Application Installs |
✔ | ✔ | ✔ |
| Calendar Plus JavaScript API | ✔ | ✔ | ✔ |
| General Calendar Functionality |
✔ *Warning popup |
✔ | ✔ |
| Resource Scheduling Functionality |
✔ *Warning popup |
✔ *Warning popup |
✔ |
| Support | ✔ | ✔ | |
| Update Notifications | ✔ | ✔ |
- The Calendar Plus plug-in is offered with either a Trial License or Paid License (Basic or Pro).
Basic License: A paid license with all general calendar functionality
Pro License: A paid license which includes all functionality of the Basic License, plus additional resource scheduling and management - The Trial License has the following limitations, but all functionality can be freely used without any time restrictions.
- A trial popup notification will be displayed when starting the application, adding a new event, or using a Pro feature.
- No support will be provided. - Purchasing a Paid License offers the following benefits:
- No trial popup notifications are displayed. (Attempting to use a Pro feature with a Basic license will continue to display a popup notification.)
- Support is provided via email to assist with plug-in setup.
- Email notifications of any Calendar Plus updates. - Updates to the Calendar Plus plug-in are provided free of charge. Please download the latest version and install it in your Kintone environment as appropriate.
- A single Paid License covers only one Kintone Customer contract (one Kintone domain). An activation key will be issued for each individual license.
Download Plug-in
(for both Trial / Paid Licenses)
Please read the Terms of Service

Price
(annual contract)
Contact KDDI America Plug-in Marketplace
Plug-in Setup Instructions
Step 1: Installing the Plug-in
After downloading the Calendar Plus Plug-in from the above link (calendarPlus_v16.2.zip), install it into your Kintone environment under the Other > Plug-ins option within the Kintone Administration panel. For information on how to access your Kintone Administration panel to install a plug-in, please see these instructions. Note that System Administrator privileges are required in order to install a Plug-in.
Step 2: Create the Application
Next, you will need to add a new application to your Kintone environment in order to use the Calendar Plus Plug-in. The requirements for the application are as follows:
- Title Registration Field (Text field) [Required]
- Title Display Field (Text, Number, Lookup, Calculated, Radio button, or Drop-down field) [Optional]
* Note that a separate Title Display Field is not required if you intend to use the Title Registration Field as the Title Display Field. - Image Display Field (Attachment field) [Optional]
- Starting Date/Time Field (Date and Time, or Date field) [Required]
- Ending Date/Time Field (Date and Time, or Date field) [Required]
- All Day Field (Check box field with one option) [Required]
* For example, create a check box field simply containing an "All day" option. - Background Event Field (Check box field with one option) [Optional]
* For example, create a check box field simply containing an "Background event" option. -
Event Order Control Field(Text, Number, Lookup, Calculated, Radio button, or Drop-down field) [Optional]
- Share Access Setting Field (Radio button or Drop-down field) [Optional]
* Please ensure a selection containing the value "Private" is added.
* For records where this field is set to "Private", please also set the access privileges so that it can only be viewed, edited, or deleted by the creator. - Color List Field (Radio button or Drop-down field) [Optional]
- Resource Selection Field (Radio button, Drop-down, Check box, Multi-choice, User selection, or Lookup field) [Required in Pro Version only]
Please prepare the selection fields that contain values for the resources, such as conference/meeting rooms or vehicles. For person in charge, please use a User selection field.
By utilizing Lookup fields, it is also possible to maintain and manage the master data of all resources in a separate application. The data fields in the separate application can then be used as resources within Calendar Plus. When using a separate application, ensure that either the single line Text or Number field used for lookup has the "Prohibit duplicate values" option enabled. Additionally, if a Radio button or Drop-down field is added in the separate application, the resources being displayed can optionally be switched/viewed based on the selection. - In order to display the Calendar, add a Custom View inside the application settings. Please use <div id="calendarPlus"></div> in the HTML Code text input box. [Required]
* To display Calendar Plus on mobile, select "Both Desktop and Mobile-optimized views" in "Use This View in".
* Do not select "Enable pagination" as it is not required.
If setting up an application manually is too difficult, a sample application is available for download. Feel free to download it and try it out with the Calendar Plus plug-in.
* The application template contains both "Calendar Plus Sample Application" and "Master Data" applications. When using the Resource Scheduler and the Resource Selection Field is set to a Master Data lookup field, the records in the Master Data application are referenced as resources.
* For instructions on how to install and setup the sample applications in your Kintone environment, please see the following instructions.

Step 3: Setting up the Plug-in
- After creating the application in step 2, add the Calendar Plus plug-in to the application via the [App Settings > Plug-ins] selection. For further information on how to add a plug-in to an application, please see these instructions.
- After successfully adding the plug-in, a gear icon is now visible and can be used to setup Calendar Plus.
- Activation Key
If you have purchased a license for Calendar Plus, please enter your activation key below. - Default Calendar View [Required]
Select between monthly, weekly, or daily views to use as the default calendar view.
When the Schedule by Resources option is enabled, resource views by month, week, or day can additionally be selected. - Title Registration Field [Required]
Select the field to use for registering event titles. (Must be a single line Text field.) - Title Display Field [Required]
Select the field to use for displaying event titles. (Must be a single line Text field, Number, Lookup, Calculated, Radio button, or Drop-down field.) - Image Display Field
Select the attachment file field to use for displaying images. (Must be an Attachment field.) - Starting Date/Time Field [Required]
Select the field to use for the starting date/time. (Must be either a Date and Time, or Date field.)
Note that when using with a date field, event times cannot be stored and all events will be shown as "All Day". - Ending Date/Time Field [Required]
Select the field to use for the ending date/time. (Must be either a Date and Time, or Date field.)
Note that when using with a date field, event times cannot be stored and all events will be shown as "All Day".
Please ensure you use the same field type for both Starting Date/Time and Ending Date/Time Fields. - All Day Field [Required]
Select the field to use for specifying events that last the entire day. (Must be a Check box field with only one option.)
Also please use a value that represents "All Day" and is selected.
For example, use a check box containing a single value of "All Day", and ensure it is selected. - Background Event Field
Select the field to use for specifying background events. (Must be a Check box field with only one option.) -
Event Order Control Field
Select the field that controls the sort order of events with identical start and end times.(Must be a single line Text field, Number, Lookup, Calculated, Radio button, or Drop-down field.)* When a Radio button or Drop-down field is selected, the items will be sorted in character code order based on each option's string value, rather than in the order the options are listed.
* If the field is not specified, the events will be sorted in the order of the displayed title strings. - Time Interval [Required]
Select the desired time interval for the calendar display. (5, 10, 15, 20, 30, 60, or 120 minutes.) - Display Time Range [Required]
Select the daily start and ending time ranges for the calendar display. - Starting Day of Week [Required]
Select the day of the week the calendar should display as the start of the week.
Selecting [Current Day] will always position the current day as the start of the week. - Business/Working Days
Select your usual business/working days during the week. (Non-business/working days will be shown in the calendar with a grey background.) - Event Registration Behavior
Enable if you would prefer to show the Kintone standard record creation page when adding an event by clicking or dragging. By selecting this option, you can enter detailed information about the event after adding it from the calendar view.
If this option is disabled, a popup dialog allows entry of the event title to quickly allow registering of new events. - Allow / Disallow Event Overlap [Required]
Select whether to allow or disallow multiple events to be registered within the same time range.
* This setting only controls the behavior of drag & drop on Calendar Plus. It has no effect on the Kintone standard record creation/editing page. - Disallow Drag and Drop
Select this option to disallow changing of an event's date or time by dragging on the calendar. This helps prevent accidental event changes when using Calendar Plus with a tablet or other touch input-based device. - Drag and Drop Confirmation
Select this option to display a confirmation dialog when changing an event's date or time by dragging on the calendar. - Share Access Setting Field
Select the field to use for controlling the share access setting of the calendar. (Must be a Radio button or Drop-down field.)
Also please use a value that represents "Private" and is selected. - Color List Field
Select the field to use for color coding. (Must be either a Radio button or Drop-down field.)
Please ensure the field selected has up to 12 different color values added to it to use for categorizing events on the calendar.
* If you do not want to display the color legends on the calendar screen, check "Do not display color legends on the calendar screen". - Resource Scheduler (Pro only)
Enable this option to allow scheduling of resources. Up to five types of resources can be configured. -
Resource Selection Field (1)-(5) (Pro only) [(1) Required]Select which field to use for resource selection when resource scheduling is enabled. (Must be a Radio button, Drop-down, Check box, Multi-choice, User selection, or Lookup field.)
Up to five different resource types can be configured, and each resource can be easily switched between in the calendar view. - Title Display Field (1)-(5) (Pro only)
With this resource, select the field to use for displaying event titles. (Must be a single line Text field, Number, Lookup, Calculated, Radio button, or Drop-down field.)
*If the field is not specified, the field set in "Title Display Field" has priority. - Allow / Disallow Event Overlap (1)-(5) (Pro only)
With this resource, select whether to allow or disallow multiple events to be registered within the same time range.
* This setting only controls the behavior of drag & drop on Calendar Plus. It has no effect on the Kintone standard record creation/editing page.
*If the field is not specified, the field set in "Allow / Disallow Event Overlap" has priority. -
Resource Display Setting (1)-(5) (Pro only) [Required when Resource Selection Field is a User selection field]Selection of this field is required when the Resource Selection Field (above) is a User selection field. To link resources with Departments, select "Link resources with Departments (in Users & System Administration)", or select the groups (or roles) to initially display as a resource.
- Resource Display Sort Order Setting (1)-(5) (Pro only)
This setting can be optionally specified when the Resource Selection Field is a Lookup field. (Must be a Record number, created Date and Time, updated Date and Time, Created by, Updated by, single line Text, Number, Radio button, Drop-down, Date, Time, Date and time or Link field in the Datasource application used for lookup.)
The sort order specified here controls the display order of resources in the calendar resource view, and can be set to ascending or descending order. If the sort order is not specified, the Resource Selection Field will be used as the display order. -
Source Record Lookup Filter Setting (1)-(5) (Pro only)This setting can be optionally set when the Resource Selection Field is a Lookup field. (Must be a Radio button, Drop-down, Check box, Multi-choice field in the Datasource application used for lookup.)
In the calendar resource view, the resource display can be filtered (switched) on the value selection of this field. - Hide "Unset" Resource (Pro only)
Enable this option if you do not wish to display the "Unset" resource in the calendar view. -
Display Resources Horizontally in Day and Weekly View (Pro only)Enable this option to display resources horizontally (instead of the hourly time) in the standard calendar daily or weekly view when the Resource Scheduler option is enabled. Note that the display width for each resource name may shrink with many resources.
- Activation Key
- After completing all of the above settings, click the "Save" button to save your changes, then click the "Activate App" or "Update App" button in the Application Settings screen.
Congratulations, setup is complete and
you can now begin to use Calendar Plus!
Notes
- If you see a "Failed to save processing" error message after clicking on the calendar to add a new event, please recheck that all required fields (except for the start/end date/time fields) have been set and their default values have been correctly populated. Calendar Plus does not register any required values, which can lead to a save failure.
- Although the Title Registration Field only supports a single line Text field, it is also possible to select and specify a Lookup field whose lookup source is a single line Text field. When using a Lookup field for the title in this manner, please note the following when clicking on the calendar to add new events:
a) The lookup copy source field must have the "Prohibit duplicate values" option enabled.
b) The string that exists in the lookup copy source must be entered exactly for the title. (If a Lookup field is not required, not specifying a title is also allowed.) - Because the Calendar Plus event display is linked with Kintone's standard filtering conditions, it is possible to set multiple customized views with different filtering criteria. However, depending on the filtering conditions used, an event may sometimes not immediately appear in the calendar view after adding it by clicking on the calendar. (For example, if the default color setting for new events is green and the filtering condition is set to display only red colored events, a new event that is registered with a green color will not be visible in the customized view even after directly adding the event due to the red filter.) When clicking on the calendar to add new events, it is recommended to use a customized view without any filtering conditions.
For Advanced Users
- It is possible to set reminders based on calendar event start/end dates. For further details, please see the "Configuring Reminder Notifications". The sample application template has already been setup to notify the event creator one hour before the event start time.
- If a User selection field is set as a Resource Selection and multiple users are selected from within the Kintone edit screen for that field, Calendar Plus will display a single event as an event to all selected users.
- Adding a new event, changing an event's date or time by drag/drop, or deleting an event within Calendar Plus will trigger Kintone's Webhook function. If you are considering linking with an external service such as Microsoft Flow, please feel free to make use of this functionality. For details on Kintone's Webhook function, please refer to "Creating a Webhook in an App".
- Regardless of the local timezone of each user, events are always registered and displayed in the correct timezone of that user. (For example, if a user in Japan adds an event at 9:00am, a different user in England will see the event as 0:00am.) Note that this functionality is dependent on the device settings used to access the Kintone environment. Please ensure that the Kintone user timezone and the device's timezone settings are correctly set.
- Users who do not have permission to view the "Display title" field in "Permissions for Fields" will be displayed as (No permission). If you want to limit the range to display the schedule details, please consider using "Permissions for Fields" for the "Display title" field.
Release Notes
- Ver.16.2 Release (13 May 2026)
- Ver.16.1 Release (28 Jan. 2026) bug fixes only
- Ver.16.0 Release (27 Oct. 2025)
- Ver.15.5 Release (4 Mar. 2025)
- Ver.15.3 Release (23 Apr. 2024) bug fixes only
- Ver.15.2 Release (19 Apr. 2024) bug fixes only
- Ver.15.1 Release (16 Apr. 2024) bug fixes only
- Ver.15.0 Release (15 Apr. 2024)
- Ver.14.0 Release (5 Jun. 2022)
- Ver.13.0 Release (25 Feb. 2021)
- Ver.12.0 Release (22 July 2020)
- Ver.11.0 Release (10 Apr. 2020)
- Ver.10.1 Release (27 Jan. 2020) bug fixes only
- Ver.10.0 Release (27 Jan. 2020)
- Ver.9.4 Release (24 Apr. 2019) bug fixes only
- Ver.9.3 Release (8 Apr. 2019) bug fixes only
- Ver.9.2 Release (12 Mar. 2019) bug fixes only
- Ver.9.1 Release (11 Mar. 2019) bug fixes only
- Ver.9.0 Release (7 Mar. 2019)
- Ver.8.1 Release (30 Nov. 2018) bug fixes only
- Ver.8.0 Release (28 Nov. 2018)
- Ver.7.5.1 Release (15 Oct. 2018) bug fixes only
- Ver.7.5 Release (12 Oct. 2018)
- Ver.7.0 Release (22 Aug. 2018)
- Ver.6.0 Release (13 Mar. 2018)
- Ver.5.0 Release (10 Oct. 2017)
- Ver.4.1 Release (5 Sep. 2017) bug fixes only
- Ver.4.0 Release (9 Sep. 2016)
- Ver.3.0 Release (14 Jun. 2016)
- Ver.2.1 Release (3 Feb. 2016) bug fixes only
- Ver.2 Release (4 Jan. 2016)
- Ver.1 Release (16 Oct. 2015)